How to Buy, Send and Receive Cryptocurrency using Trust Wallet
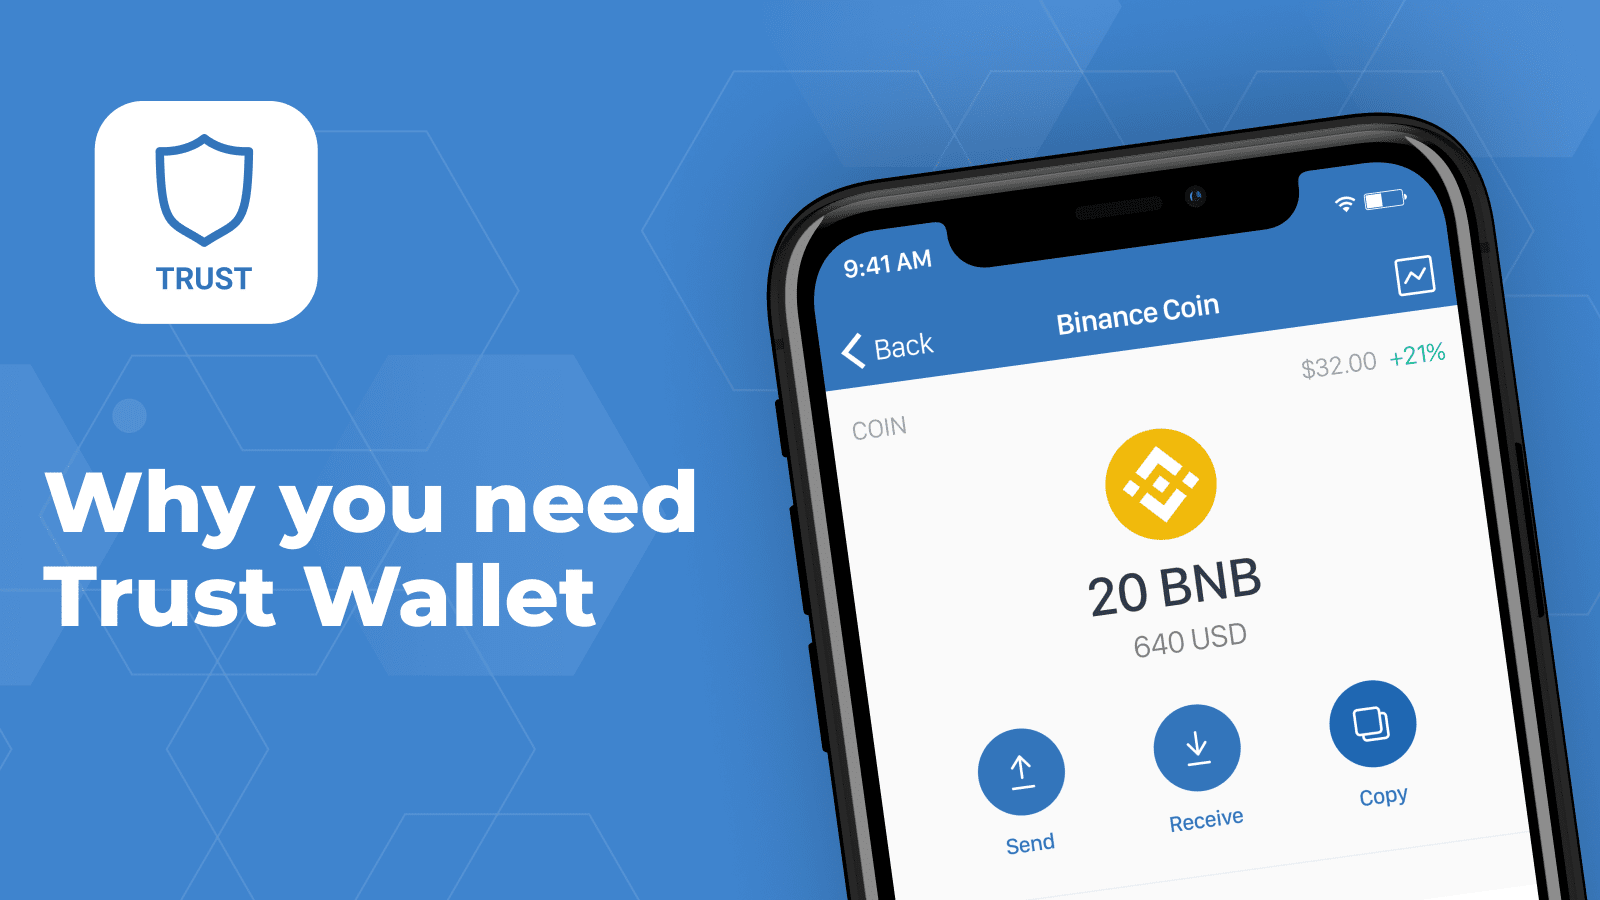
Trust Wallet is the official mobile wallet of Binance. It provides you a safe and easy place to store your funds outside of Binance, with loads of features built in to enhance your crypto experience.
How to Install Trust Wallet on your Smartphone
Installing and using Trust Wallet is completely free. You don’t have to pay to download the app and there are no hidden charges inside. Naturally, as with any blockchain product, you’ll have to pay network transaction fees and similar fees, but the Trust Wallet team does everything they can to minimize fees for you and they never take a cut.
Install Trust Wallet on iOS
You can download the iOS Trust Wallet app directly on your iOS device on Apple store https://apps.apple.com/app/apple-store/id1288339409?pt=1324988&ct=website&mt=8
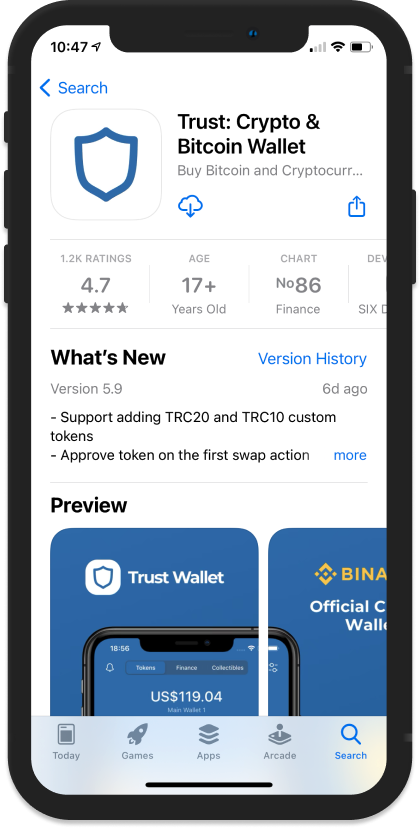
- Open App Store from your iOS device
- Tap on search and enter 'Trust Wallet' in the search bar.
- Look out for the app with the Trust Wallet badge. Tap download (the cloud icon).
- Trust Wallet should be downloaded to your home screen after authentication.
Install Trust Wallet on Android
Download and install Trust Wallet from Google Playstore on your Android device https://play.google.com/store/apps/details?id=com.wallet.crypto.trustapp&referrer=utm_source%3Dwebsite
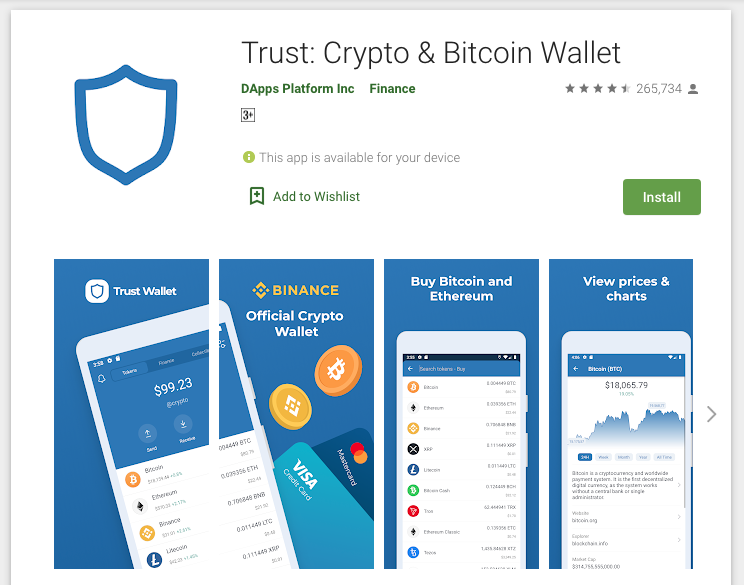
- Open Google Play store on your Android device
- On the search bar, enter "Trust Wallet". A couple of result should show up, click on the option with the Trust Wallet badge (above).
- Click 'Install' to install Trust Wallet on your smartphone.
You can as well use the Trust Wallet APK direct download link for Android: https://trustwallet.com/dl/apk
Setting up your Trust Wallet Account
If you are new to Trust Wallet (which I'm assuming you are) follow this guide to setup your Trust Wallet.
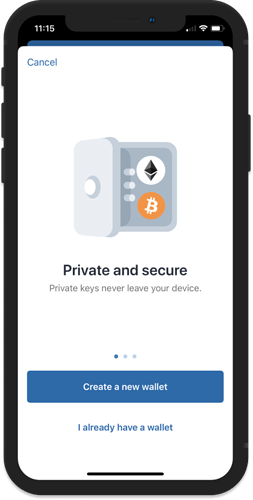
Step 1 - Launch Trust Wallet
Locate and tap on the Trust Wallet icon on your smartphone. Upon first launch of the app, you will be presented with the screen below which is the part where you can “Create a New Wallet” or “Import” an existing one. For this guide, we will select on Create a New Wallet.
Step 2 - Accept Terms of Usage
In order to proceed, you would need to accept the Terms of Usage. Simply put a check mark at the box then press on Continue.
Step 3 - Save your Recovery Phrase
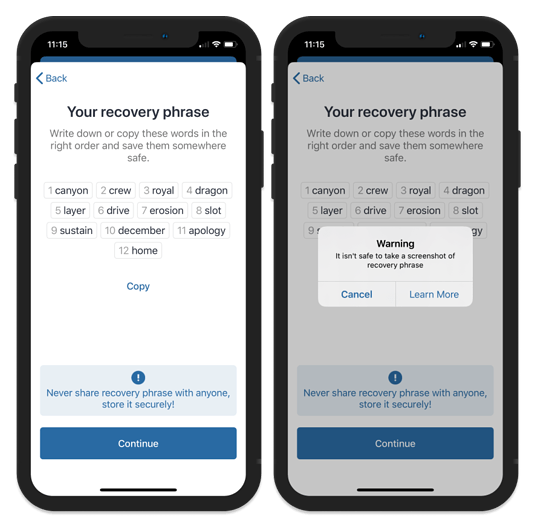
This is the most important part of your crypto journey. You need to take note of your recovery seed phrases. Your recovery phrases are the keys to your crypto wallet. So make sure to keep them in a safe place. Tap on Continue to proceed.
Step 4 - Verify your Recovery Phrase
If you followed Step 3 and backed up your recovery phrase, this will be a breeze.
In the correct order, select the words in order to complete the verification process. Click Continue when you are finished.

Step 5 - Wallet is Ready
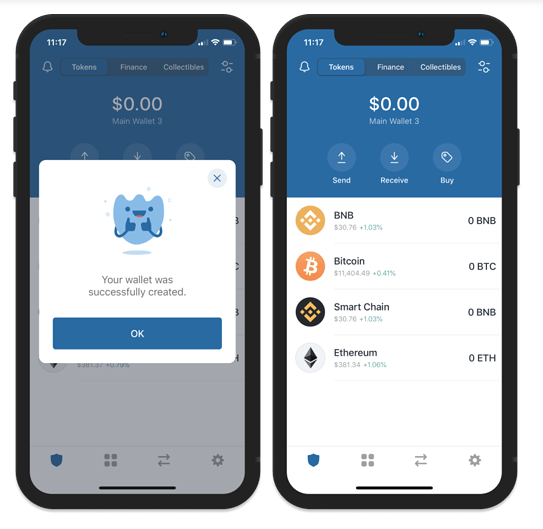
After going thru the backup and verification process you will be redirected to the main wallet screen. You will see an initial list of coins that you can start funding right away. Congratulations!
To buy, send or receive an asset, simply tap on the cryptocurrency or search if the asset is not listed on your home screen. Tap to buy, send or recieve.
Secure your Assets
- Please be aware that, losing your recovery phrases will also mean that you lose access to your wallet.
- That being said, you should store your recovery phrases in a secure location.